Reveal and Non-reveal NFT Projects: Creating an NFT Collection Through NiftyKit
- Users can create custom smart contracts through the usage of NiftyKit.
- Each NFT can either be minted on the Ethereum or Polygon blockchain network.
- NiftyKit offers two main services, Classic, which is intended for a regular collection, and DropKit, which is intended for large collections.
- Reveal and Non-Reveal is currently exclusively available within the DropKit Collection.
- Each DropKit member has the opportunity of embedding a mint button throughout their website.
NFTs have truly shaken up the cryptocurrency industry, and some of them are now worth thousands of dollars. This has inspired many artists to truly showcase their artistic prowess and develop NFTs and NFT collections that have made them famous, rich, or have simply allowed them to create a new revenue stream through which they can utilize their artistic talent.
Some creators might be interested in creating hype surrounding their NFT drops prior to them actually going live. Here, they can utilize non-reveal NFT projects, where they can essentially delay the initial launch of the NFT, all whilst putting a placeholder in the meantime.
As such, we will go over everything you need to know in regards to building your own NFT collection, after which, we will be discussing how generative NFT reveals work and what kind of strategies you can implement for a profitable reveal process.
The NiftyKit Solution
NiftyKit is a no-code solution specifically developed for the creation of NFT smart contracts. In other words, its main purpose is to enable users to easily create, manage as well as sell NFTs on their own custom ERC-721 smart contracts.
However, NiftyKit is not just limited to this functionality but has a plethora of services on offer, which will help any NFT creator utilize it to its maximum and launch their own custom NFT drops from the minting phase to the sales phase.
Note that there are two types of sales that can occur through the utilization of NiftyKit, and these are the pre-sale and the public sale. The presale mint princess will typically be lower than those in a public sale, and pre-sales are typically only for the whitelisted members, which are guaranteed the ability to mint an NFT before the regular public sale. These are used as a means of creating hype surrounding the NFT collection.
What is DropKit?
DropKit is a service offered by NiftyKit which enables users’ access to tools that allows them to build hype for the launch of their NFT collections. They can create a drop, upload their art, add traits and attributes, and even set the drop date. This way, the creators can put their focus towards the process of promoting the upcoming NFT drop instead of searching for developers or platforms that will allow them to build their smart contracts.
The main benefits surrounding DropKit include the fact that users can create no-code smart contracts, that they have the option to drop all their NFTs at once, alongside features such as selling first by inviting collectors to mint and then revealing the NFTs everyone received at a later date, and add traits and attributes.
Additionally, they can save money on minting costs, as buyers will pay the cost of minting the NFTs, while all the user has to do is to pay the fee for deploying the gas-optimized smart contract on the blockchain and the fee set by NiftyKit which will be deducted from their sales upon withdrawal. Furthermore, each user can manage all of their NFT drops from a single place.
Throughout this guide, we will be taking a look at everything you can do through the utilization of NiftyKit when it comes to creating your very own NFT collection.
We will be covering the NFT builder, how you can create an NFT Drop collection, how to set up an NFT reveal after minting, how to set up NFT Mints on your website, and how you can make an NFT collection.
Before we dive too deep within the creation process, there are a few things you need to know.
NiftyKit offers two types of services on its platform in terms of NFT project drops:
- The Classic Collection is a regular collection ideal for smaller drops.
- The DropKit Collection is ideal for large collections. Note that, reveal and non-reveal is only available through DropKit.
DropKit Reveal and Non-Reveal NFT Projects Explained
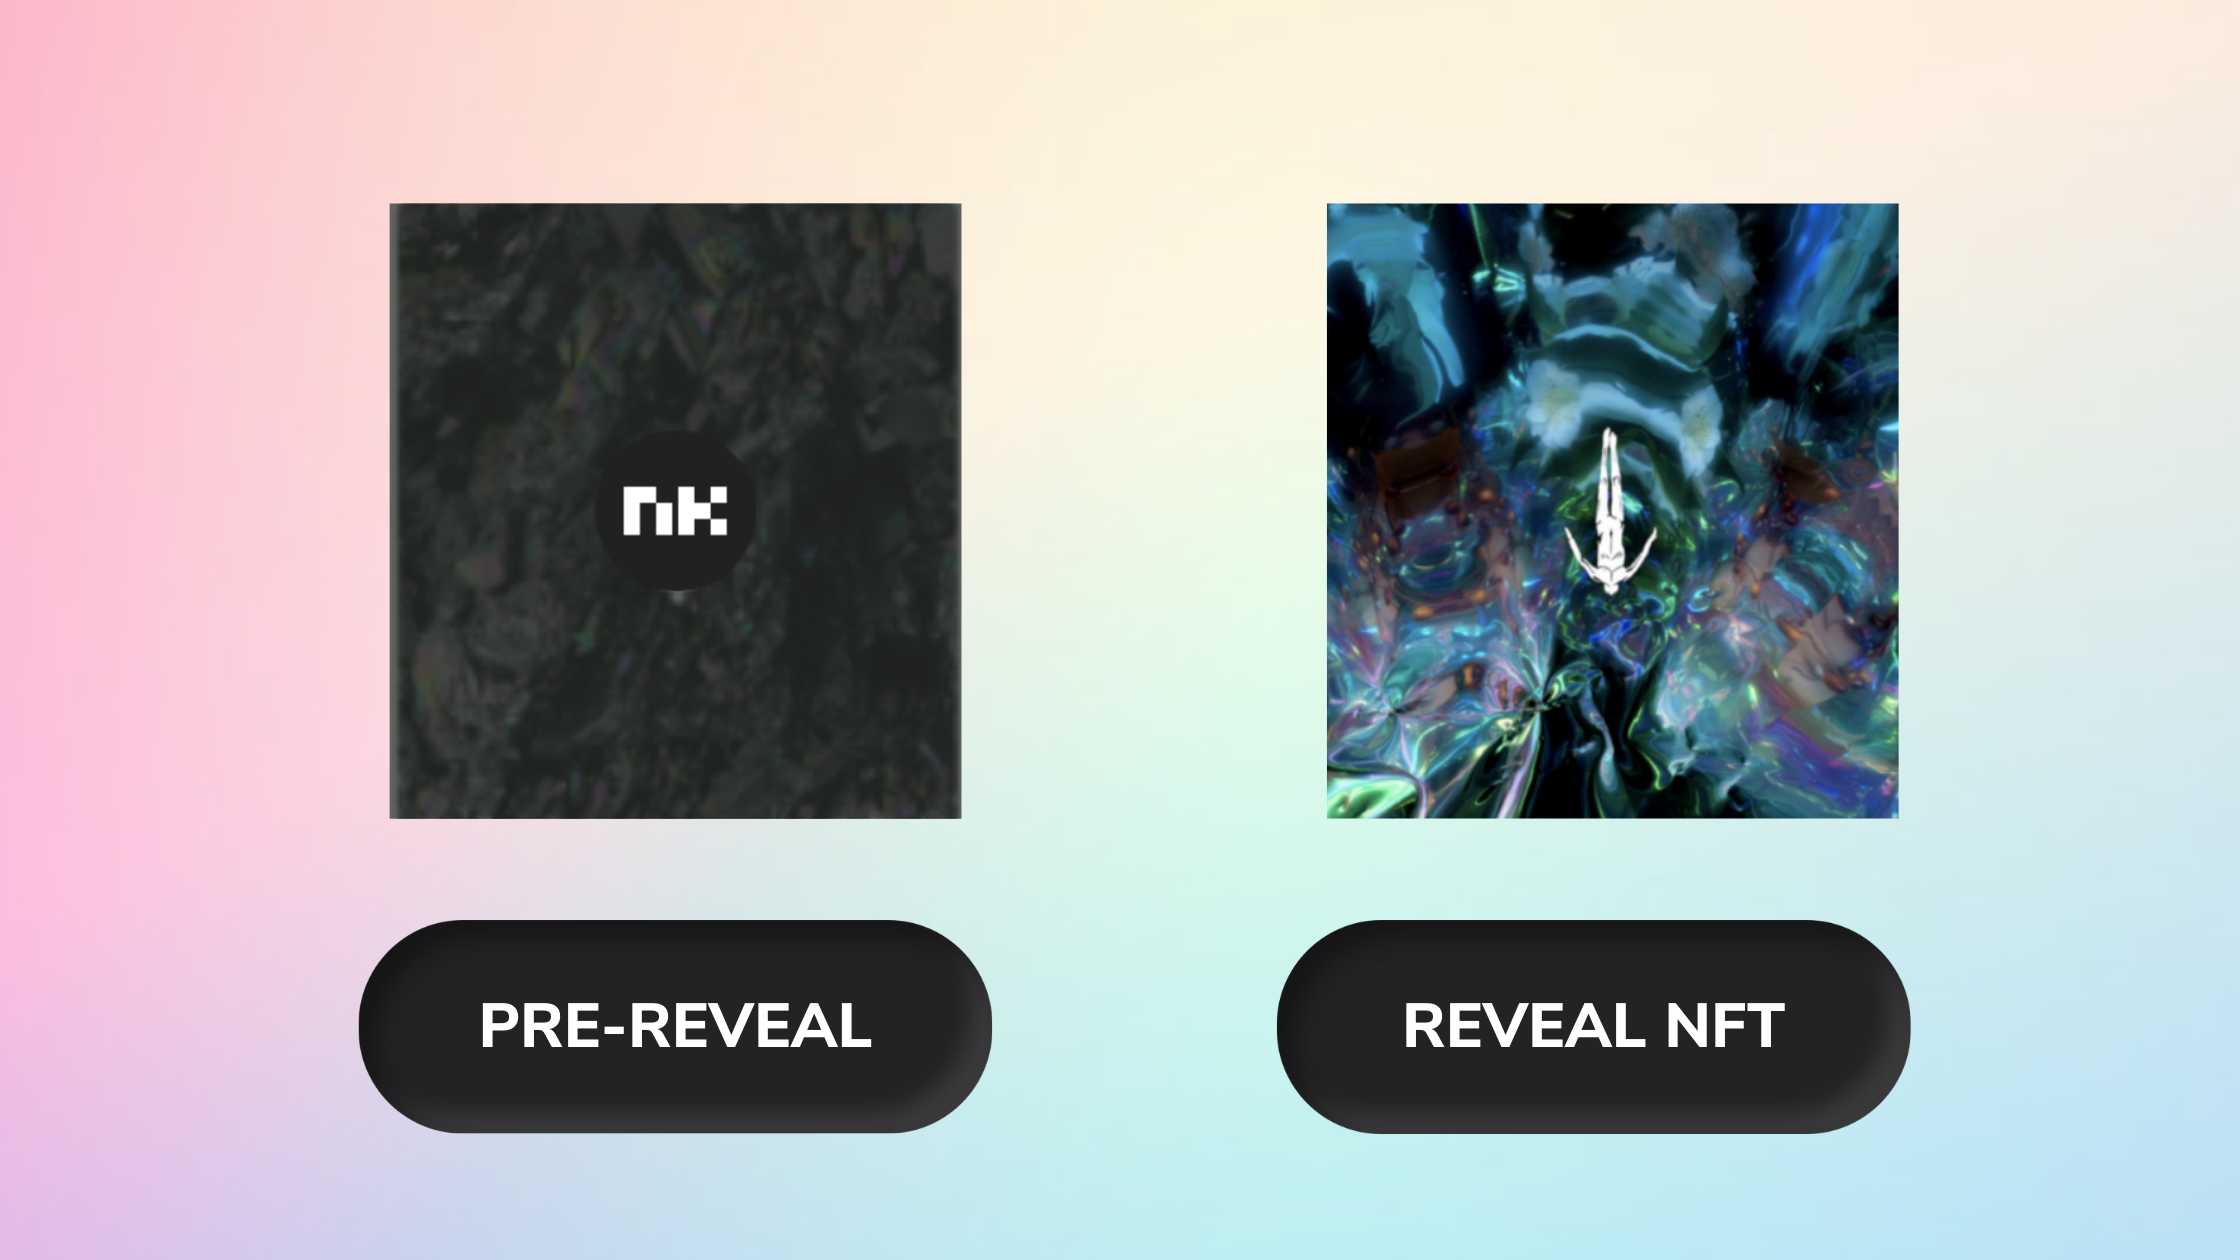
Within generative NFT sets, NFT buyers go to a minting page, where they have to mint the NFT from a specific set. At the beginning of the sales, the NFT drop ownersNFT teams typically do not show buyers their NFTs, and instead, they display a placeholder NFT. This placeholder would appear for every single NFT which was bought. At some point post-sale, which could be a day, a week, or even further down the line, the team behind the NFTs reveals them completely.
NFT reveals are linked with profitability, as NFT teams typically get a percentage of secondary sales. So if a creator would launch an NFT project which would turn into a popular set with a few thousand ETH throughout the pre-reveal trading, this could amount to significant additional revenue for the drop.
Through the usage of NiftyKit, you can create NFT Delayed Reveals. What this essentially means is that you can launch your NFT projects within the span of dew days.
NiftyKit offers two main services, Classic, which is intended for a regular 1/1s collection, and DropKit, which is intended for large collections.
Keep in mind, however, that Reveal and Non-Reveal is currently exclusively available within the DropKit Collection.
The addition of a pre-reveal placeholder asset to your NFT drop makes it so that your NFTs and metadata are hidden upon the initial mint and allows you to control when your community can gets to see the final assets and metadata and avoid sniping. Sniping occurs when the metadata is pushed live and hosted on IPFS, and helps snipers choose which NFTs to purchase or mint based on the rarities of the traits which are exposed throughout the metadata.
DropKit essentially enables you to decide when and how much you want to reveal. When you reveal, you will be pushing metadata for your NFTs to IPFS, and it will be exposed through the IPFS link, which is set in the smart contract call that you execute when you are ready for your reveal.
Once you click on reveal, you can choose to reveal all of the NFTs or reveal a custom range. Once you are ready for the reveal, you can click on the “Reveal” button and choose which NFTs get revealed to your current NFT token holder.
Additionally, you can create smart contracts first prior to adding NFTs, and any image listed on the NFT tab at the time of the smart contract creation will be uploaded to IPFS. Learn more about NFT delayed reveals here.
With that out of the way, let’s dive into how all of it works, step-by-step.
1. Creating the custom smart contract
Prior to learning how to make an NFT collection, you will need to create custom smart contracts.
NFTs are stored in what are known as smart contracts, which are essentially executable code that executes automatically, and runs on top of a distributed ledger on which the NFT is recorded. NiftyKit specifically enables two types of smart contracts which any user can create, and these include:
- A smart contract on the Ethereum Mainnet
- A smart contract on the Polygon network
The provable ownership of the art, music, as well as other digital and physical content, is linked to a single token, which contains the information that ensures collectors are building authentic NFTs from creators.
The first step towards creating an NFT is to create a custom branded Whitelabel smart contract for them.
Through the utilization of the simple Smart Contract builder, you can create your smart contract easily through NiftyKit.
All you have to do in this case is upload an image, upload a banner, enter the collection name, add the collection symbol and add a description to let everyone know what your collection is about. Here, you can add additional information, such as the properties and overall metadata. You can take a more in-depth look at how all of this works in our How Do I Create a Custom Smart Contract for my NFT Collection? guide.
2. Minting your NFTs on Ethereum and Polygon
NiftyKit as a platform is free for any creator to sign up and try. You can create unlimited drafts for your NFTs and smart contracts. You can get full access to NiftyKit with the Creator pass.
It is important to note that you pay for the gas for the time being on each mint, however, NiftyKit will, at some point in the future, move to gasless polygon minting.
From the profile page, you will be able to utilize two types of collections:
- Create Collection refers to the creation of a Classic Collection
- Create Drop refers to the creation of a DropKit
Click on create a collection, and then upload an image and banner. You will also need to enter the collection’s name and the collection symbol, all of which are necessary to fill out. Once the information has been entered by your end, you can proceed to continue through the draft button.
Now, you can click on the “Create new” button and select either Ethereum or Polygon. If you have selected Polygon, for example, a pop-up will appear that you are about to create your collection. Click on the “Next” button to proceed here.
Then, you’ll see another pop-up, which will let you review the Terms of Use and Privacy Policy. If you agree to everything, click on “Create Now .”
However, while you wait for the collection to complete, you can create a new NFT and start minting.
Ensure that you select or pick the correct collections. Click on “Create,” after which you can click on “Add NFT,” and in the creations tab, click on “Add NFT” again. Remember to include your NFT’s title and description to go forward with this process. Click on Continue as Draft to begin.
Once your artwork is ready to be uploaded as a draft, you will be provided with the option to submit it to a collection if this is already final and requires no additional changes.
You can also click on Edit to improve it, delete it, or replace it. You can view our full Polygon Minting tutorial for NiftyKit NFTs and Custom Collections here.
3. Creating NFT Drops through NiftyKit
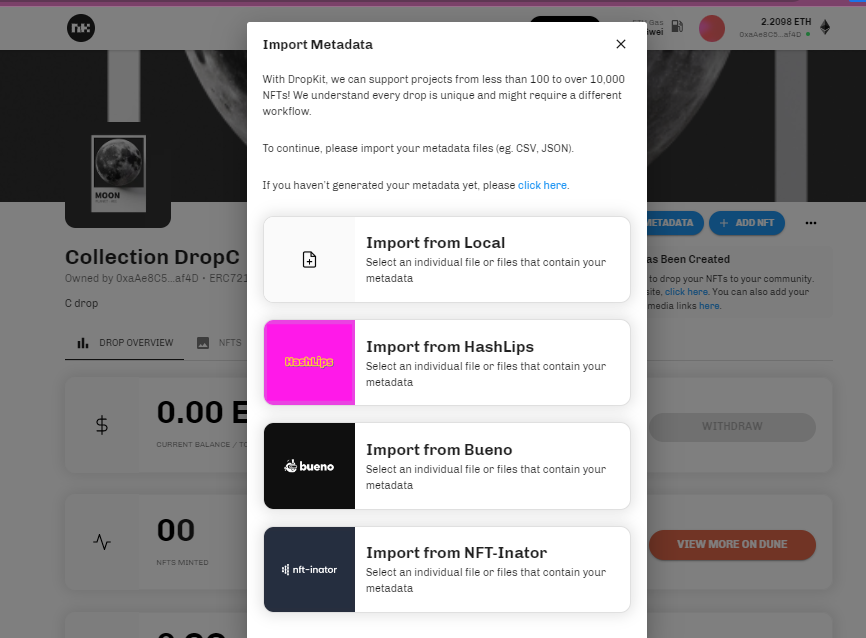
Once you have generated your assets and metadata, you will be ready to upload your creations to NiftyKit using our import CSV or JSON tool. Currently we support direct JSON import generated from bueno, HashLips, and NFT-inator. You can also use CSV file as a means of uploading in large batches.
Then all you’ll have to do is upload your images to IPFS, and you will be able to preference them in the metadata.json.
This might sound complicated, but it’s actually really simple to execute, and if you’re having trouble, you can always follow our official guide here. Note that, each Creator pass has the opportunity of embedding a mint button throughout their website.
When it comes to NFT reveals, however, when you log in, you will notice that there are a few options available within the NFTs tab that you can use as a means of configuring your reveal, where you can manage the metadata of the NFTs. After your smart contracts have been created, you can utilize CSV Import/Export, Pre-Reveal Setup, and Reveal.

You can add a pre-reveal placeholder asset to your drop which can make it so your NFTs and metadata are hidden throughout the initial mint. This in turn will allow you to control when your community will be able to see the final assets within the metadata.
Here, you can add the aforementioned pre-reveal placeholder, so that your NFTs and the metadata get protected from sniping.

Keep in mind that prior to setting your placeholder, you have to load your NFTs into the queue through the REST API or inside of the app where you get your api-key. You will not be able to apply any placeholder if there are zero NFTs.

At the point in time where you are ready for your reveal, you can click on the Reveal button, and pick which NFTs get revealed to the current NFT token holder.
Revealing your metadata will be a smart contract call which will essentially update the metadata with your final NFT image, as well as the final metadata. You can even reveal a custom range, where you can enter the start ID and end ID of the range itself.
Note that it can take upwards of 24 hours for the images to show up or update on OpenSea.
4. Creating NFT Drops through NiftyKit
By leveraging the power of DropKit within your website, you can embed a mint button directly on your drop page as a means of providing a seamless as well as intuitive experience to all of your collectors.
The front-end library provided by NiftyKit essentially allows any creator to implement a mint button through their own website within just the span of seconds, which includes NiftyKit’s javascript library, code snippet, and API key.
At the time of writing, NiftyKit supports Squarespace, WordPress, Webflow, Wix, and any other custom configuration.
All a user has to do is create a DropKit Collection, get the SDK key for the collection, insert the API key in the Code Snippet and Add the Code Snippet to the website. Then they can just publish the changes and mint on their website. You can follow our full guide here if you’re interested in taking an in-depth look at how all of this works.
Note that through the usage of DropKit and the SDK Public Key, you will be able to add a mint button to any website and host your sales on your domains while using NiftyKit as a backend to manage your drop merchants. This is how you can generate NFT collections externally.
5. Creating Redeemable NFT Drops through NiftyKit
Redeemable NFT collections essentially allow you to invite your collectors through the utilization of a special link which then lets them mint NFTs from your collection. You will have the opportunity to set the quantity, maximum per mint and then share it on social media. As your buyers end up minting, you will be able to earn revenue for each NFT redemption and can create hype through the creation of a presale list that will only let anyone on the list mint.
Redeemable NFTs can be used for Proof-of-Attendance tokens, Editions, tickets to events, giveaways and promotions, scavenger hunts, and even community building. Learn how to create a redeemable NFT collection here. Keep in mind, however, that this opportunity is only available for the users under the Classic Collection, and anyone has the opportunity to create a number of Redeemable NFTs in the same contract as well. Note that they are all based on the ERC-721 token standard.
Summary
This is just about everything that you need to know when it comes to creating and minting NFTs through the usage of NiftyKit, from the creation of the NFT itself to creating the smart contract, NFT Drops through NiftyKit, creating an NFT mint button on your native website.
Hopefully, now you have a heightened perspective about how all of this works and what you need to do each step of the way in order to finalize the process. Remember to go over each one of our guides to get an in-depth look at how everything works, step-by-step, in order for you to get the maximum utility of the NiftyKit platform and be one step closer towards being able to create an NFT collection